Offroad light install on roof basket with pics - write up.
Moderator: mikenmel08
-
- All-Mighty Scoobytruck Admin
- Posts: 354
- Joined: Mon Jul 07, 2008 2:47 pm
- Location: Moving to the UK
Offroad light install on roof basket with pics - write up.
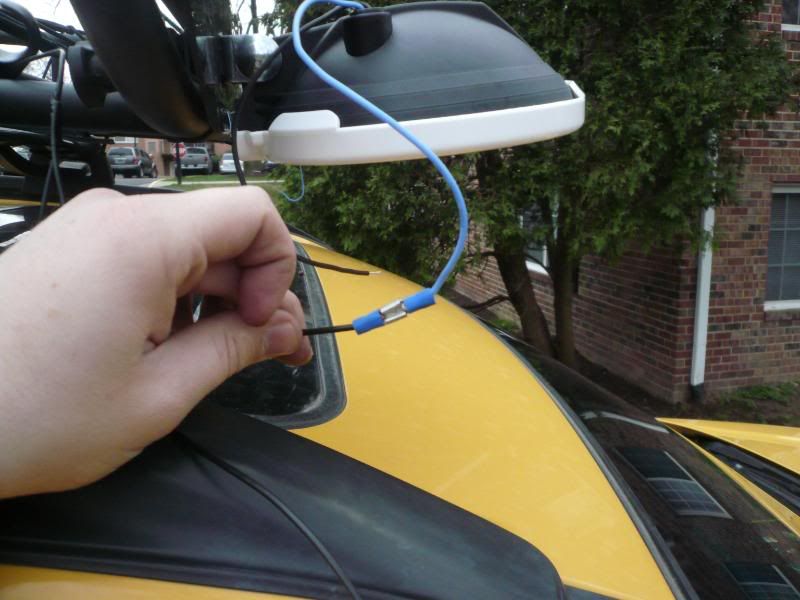
Ok so Ive wanted to put some hellas on my roof basket for awhile, so i finally did it, and FINALLY got it finished, after my car has been apart for like 3 weeks now. (which i dont suggest at all, cuz then you forget how things go back together) also, Im not writing this in alot of detail, somethings you kinda gotta figure out on your own, (i did ) but the pics should show you the progress for the most part! also, this has been over 3 weeks, so some of the pics arent all from the same day, so it might look different :0 and feel free to ask questions!
PIC A
made it so i can detach easy if i need to take off the cargo basket
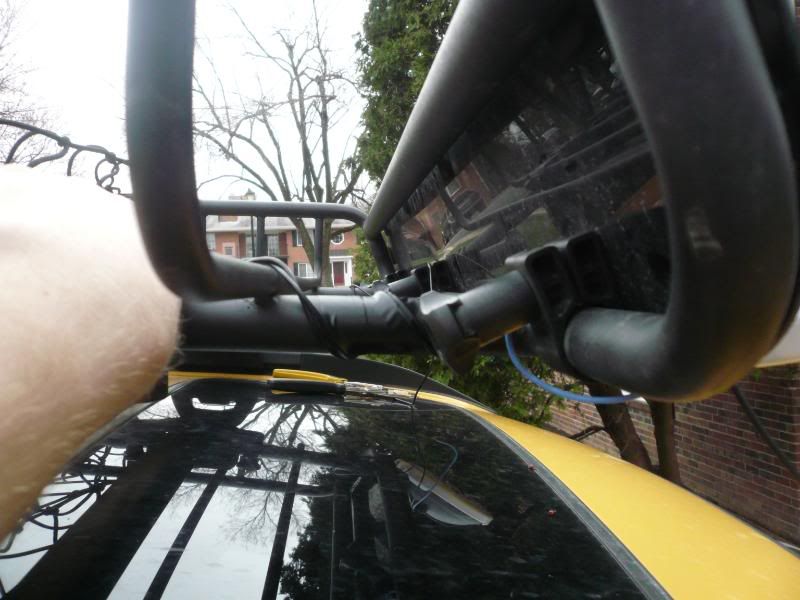
PIC B
PIC C
PIC D
PIC E
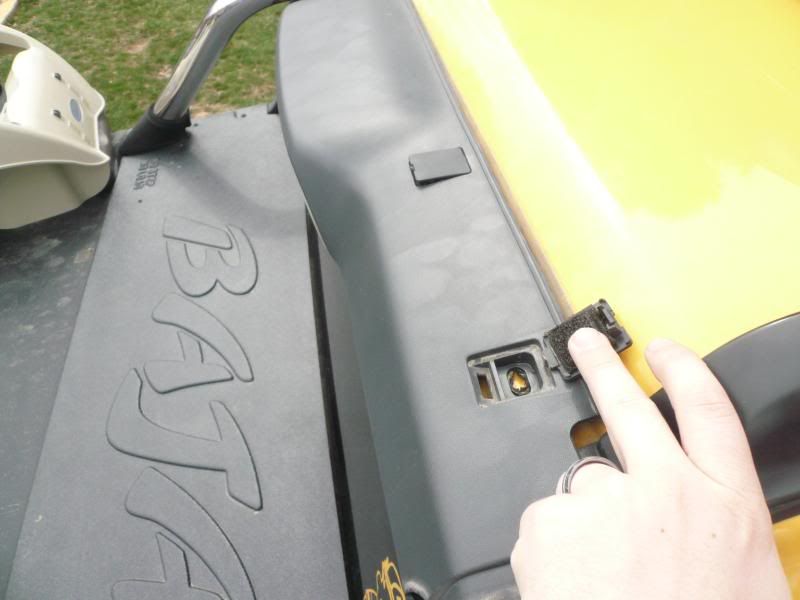
Ok first step - i figured out how i was going to run the wires into the car. i was able to wiggle and pry the top plastic off the truck, even tho the hayes manual and the subaru instructions say you have to take the whole bed apart.... i didnt..... but i did loosen the side plastic by taking apart all the clips i could remove on the right side around the sports bar.
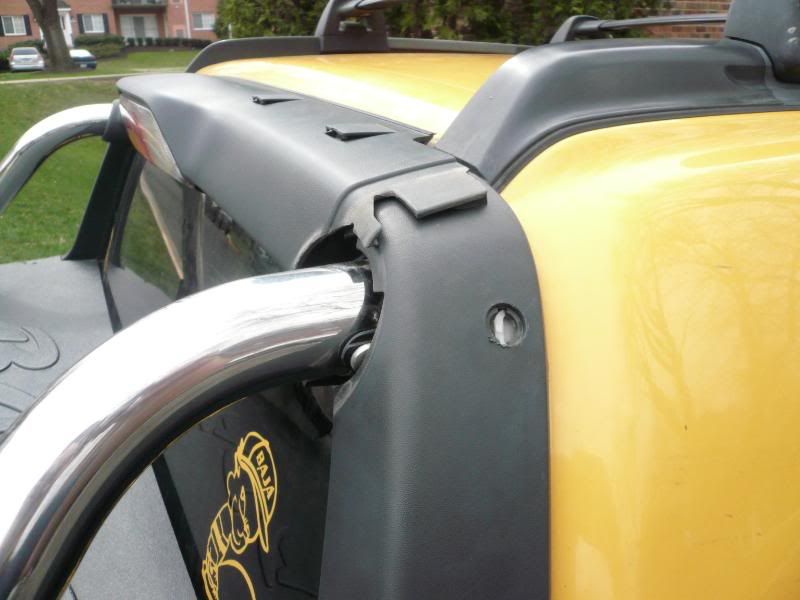
pic 1
- taking it apart
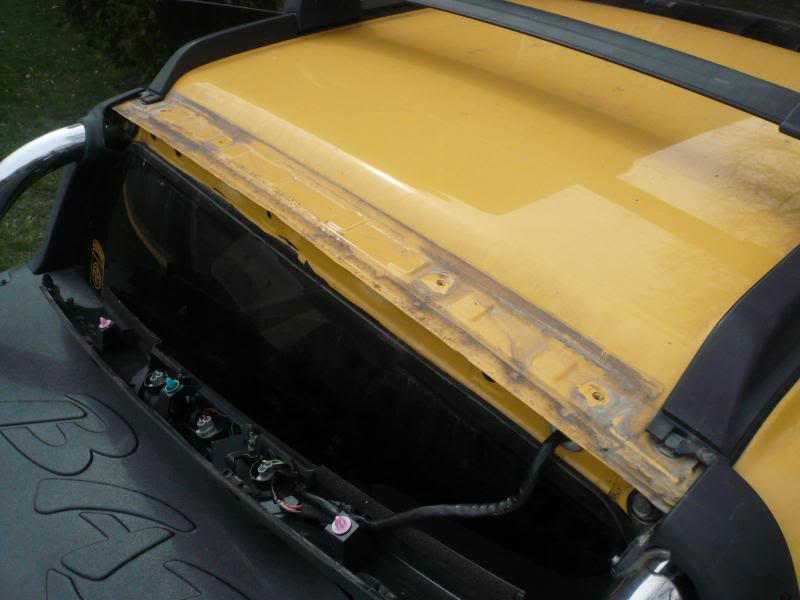
pic 2
toook out the 4 screws
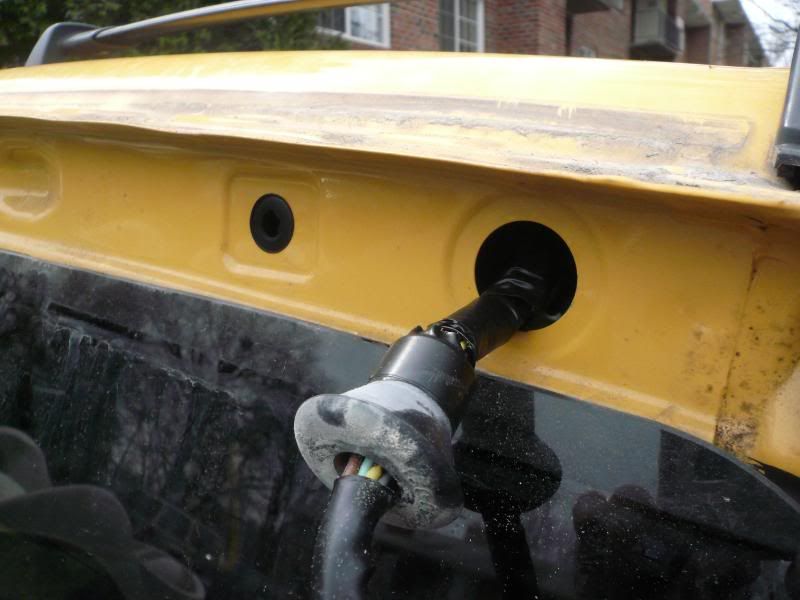
pic 3
this is where i figured id run my wires thru
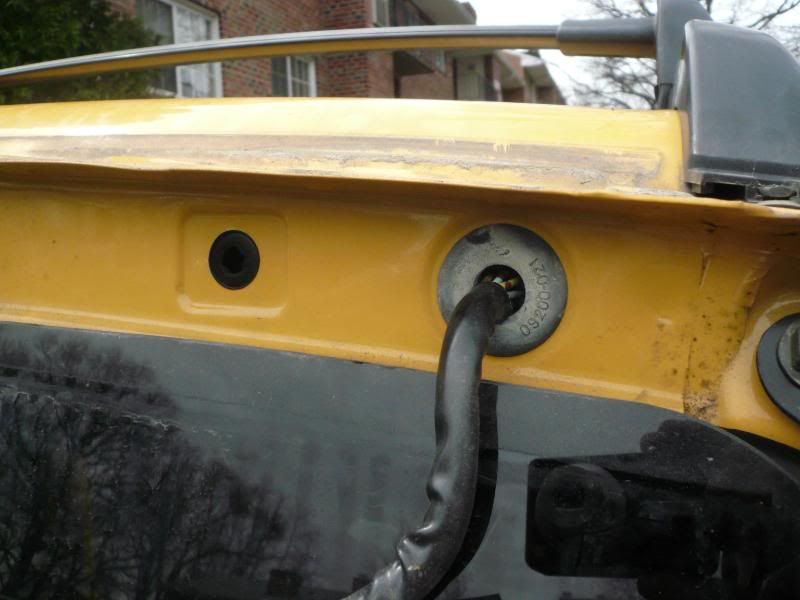
pic 4
pic 5
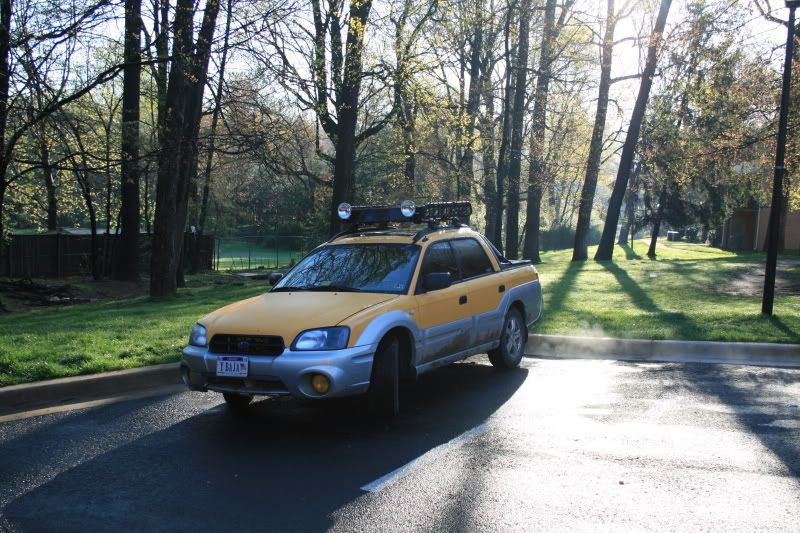
This is a pic of the completed top, i just ran the wire along the roof racks sides, and used black tape to secure them, this is what i assumed the subaru instructions for the sports lights is telling you to do, since i got some ideas from those, i dont know how long this will stay, i may have to figure something else out.
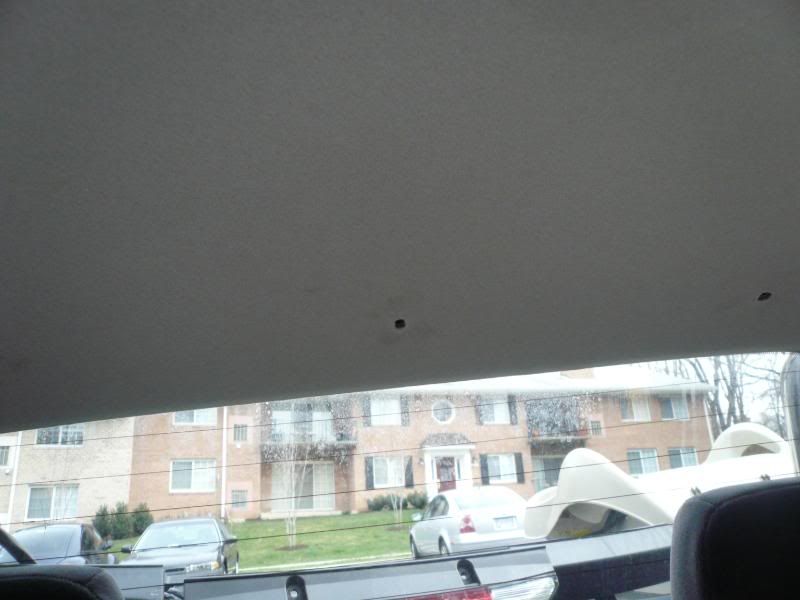
pic 6
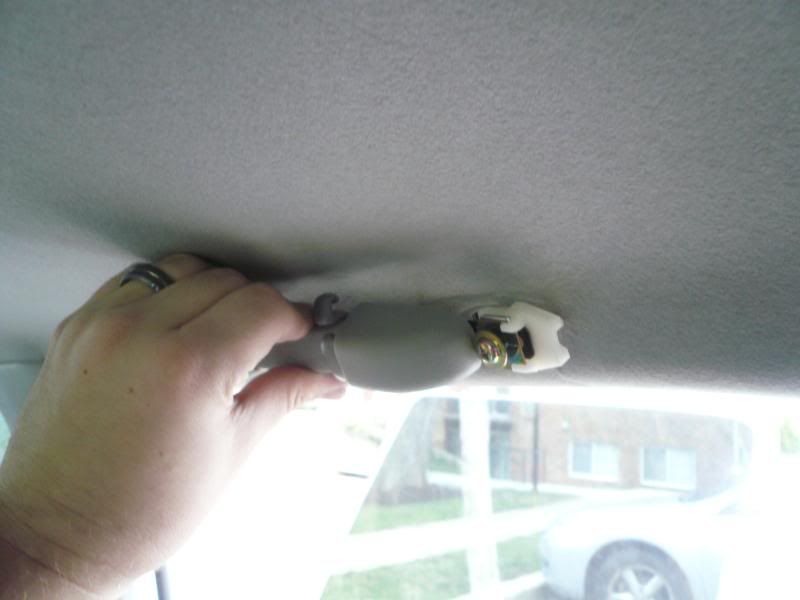
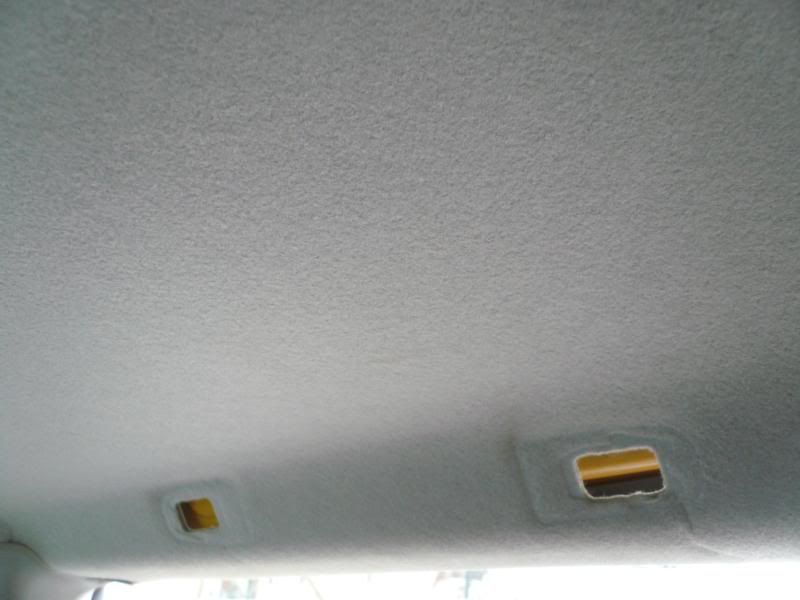
so i needed to take the interior pieces apart to be able to get at the wires, so i took the headliner down, just in the back, and the plastic interior moulding at the top
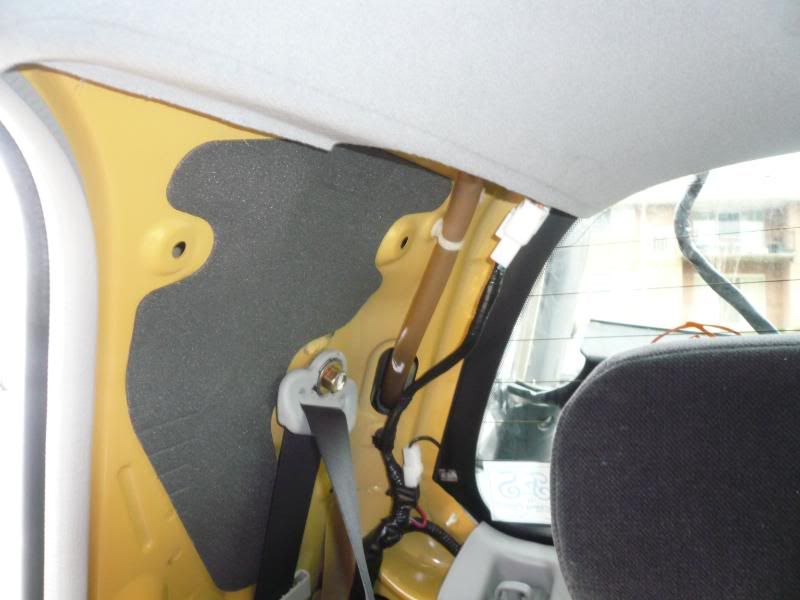
pic 7
pic 8
pic 9
had to take the handle off too.
pic 10
this is the wires running into the cab...
pic 11
my idea is to run the wire into the cab above the headliner and down the pillar between the front and back door.
-
- All-Mighty Scoobytruck Admin
- Posts: 354
- Joined: Mon Jul 07, 2008 2:47 pm
- Location: Moving to the UK
Re: Offroad light install with pics - write up.
so I figured it would be easier to ground the ground sooner than later, so i only have to run one wire, so heres where i found a ground.
pic 12
this is the bracket that goes to the third brake light and other wires that all run thru that rubber piece i popped out to run my wire thru.
pic 13
this was the first wire i tried, and it was a ground. i just vampire clipped my ground in.
pic 14
taped it all up afterwards of course.
pic 15
now run the wire above the headliner.
pic 16
and down the pillar under the moulding as you can see i pulled the bottom plastic pieces out so i would be able to work in there
pic 17
now ideally my wire wouldnt have ran out...... so i spliced another piece in here, and it had the inline fuse in it, so it'll do. run the wire into the door as much as possible, staying away from the moving parts of the seatbelt.
I put the other parts of the headliner and moulding back togetherpic 18
and the handle back in.........pic 19
pic 20
now i taped the wire down and ran it into the pillar and out the bottom, its the light green color wire now
pic 21
you can see my speaker wire in there, when i redid my speakers, i ran new wiring this same way
pic 22
tuck it all in
pic 23
tuck tuck tuck
pic 24
and now its out the font
So next is just running the wire thru my dash, to my switch, and hooking it all up!
-
- All-Mighty Scoobytruck Admin
- Posts: 354
- Joined: Mon Jul 07, 2008 2:47 pm
- Location: Moving to the UK
Re: Offroad light install with pics - write up.
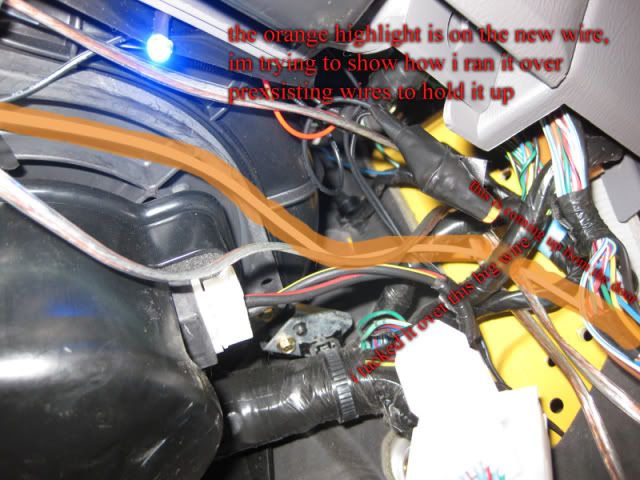
so these next pics are hard to understand, but they are the underside of the dash, there are alot of wires running all over, but ill highlight the wire im running now and show how i used the other wires to hold the new one up.
pic 25
then i just ran it into the area behind the radio, which i have pics of the radio removal that im going to put in my dash conversion thread.
this is a pic with the radio pulled out, and peering in behind it.
pic 26
and this is where i wanted my new switch, so i needed to get the exact location and drill it out. this thing just pops out, no screws.
pic 27
heres the wire running all the way over to the side of the dash that im going to put the switch in.
pic 28
i drilled a hole in the little cubby area, cuz this is where the wires from my switch are going to run
pic 29
heres the switch in its new home.
pic 30
the switches ground wire ran right here, its the blue wire.
pic 31
heres the wires plugged into the switch
pic 32
and i just spliced power off the 12v outlet and ran it to my switch, the yellow wire
pic 33
pop it back in.
ALLL DONE!!!
now off pic 34
and on! pic 35
I labeled the pics so if you guys have questions you can refer to the pics, and i hope this answers some questions people had, i know i skipped some of the steps needed to get to the steps im showing here, but they are all for the most part pretty self explanatory things. Any tips or ideas on how i couldve done this better are cool too this is my first write up with pics, and its alot harder to take pics of the process then i woulda imagined, i forgot to take pics soo many times!!!
Re: Offroad light install on roof basket with pics - write up.
Thank you soooo much. Just in time, too. UPS just delivered 4 new Baja hella lights to my house I've gotta find time to put in. Very nice job.
Last edited by Thacrudd on Tue Apr 21, 2009 7:30 am, edited 1 time in total.
FREE Cupholder restoration kit
http://scoobytruck.com/bb/viewtopic.php ... 8057#p8057
My Baja Mods
http://scoobytruck.com/bb/viewtopic.php?f=2&t=1227
http://www.youtube.com/user/thacrudd
http://scoobytruck.com/bb/viewtopic.php ... 8057#p8057
My Baja Mods
http://scoobytruck.com/bb/viewtopic.php?f=2&t=1227
http://www.youtube.com/user/thacrudd
-
- All-Mighty Scoobytruck Admin
- Posts: 354
- Joined: Mon Jul 07, 2008 2:47 pm
- Location: Moving to the UK
Re: Offroad light install on roof basket with pics - write up.
thanks guys. yeah i added a few more pics. i need a better one of the finished product up close at the lights. ill get one up soon.
Check out more pics!<<<<<< Cardomain Page. *******SOLD THE BAJA*********** But im still around, PM me if urgent!
Re: Offroad light install on roof basket with pics - write up.
Lights look great, nice write up. I do have a suggestion on the wires on you roof rail. I ran lights for my front cross-bar and ended up coming through the roof under the rail. Anyway, I used wire split loom (any Radio shack or electronics store). I attached them to the plastic portion of the rail using "P" clips. Hope this helps.
I do use them on some of the dirt roads in my area and wanted more light without going to Hella or other large lights. Some of the paths have low branches and did not want to have to straighten them out every 100 feet, so I ended up doing an upgrade. I was able to use the same plug so if I wanted I could use either light bar.
Also I did not want to use my e-brake so I grabed power from a relay I powered from my parking lights.
-
- All-Mighty Scoobytruck Admin
- Posts: 354
- Joined: Mon Jul 07, 2008 2:47 pm
- Location: Moving to the UK
Re: Offroad light install on roof basket with pics - write up.
yeah the pclips and wire loom are ALOT better then what im using, i didnt have any wire loom on hand at my time of install, cuz i definatly looked for some. Ill have to grab some pclips and do that. thanks!
Check out more pics!<<<<<< Cardomain Page. *******SOLD THE BAJA*********** But im still around, PM me if urgent!
- Alpha Wolf
- Scoobytruck Contributer
- Posts: 70
- Joined: Sun Feb 25, 2007 3:23 pm
- Location: Salinas California
Re: Offroad light install on roof basket with pics - write up.
A lot of work when you could have just purchased the factory Hella light kit on Ebay for $70 and then it was pre wired for those and would take you way less effort. Comes with relays and a new box and factory switch that uses the stock harness so no drilling on dash required. Note that the 2003 kit will work on a 2005 with just a $16 relay from your dealer as the 2003 uses a different relay to activate it. One already in use on the 2005.
Still have the ebrake activation issue but that is just one click up and no issues on mine.
Just a thought.
I like the look of your 4 light install. But here you must have them covered at all times on the street or get a ticket. Maine does not have that type of law?
Still have the ebrake activation issue but that is just one click up and no issues on mine.
Just a thought.
I like the look of your 4 light install. But here you must have them covered at all times on the street or get a ticket. Maine does not have that type of law?
2005
Turbo
Turbo
-
- All-Mighty Scoobytruck Admin
- Posts: 354
- Joined: Mon Jul 07, 2008 2:47 pm
- Location: Moving to the UK
Re: Offroad light install on roof basket with pics - write up.
I wanted to run my own wiring so I would have full control of the lights, none of this ebrake stuff. Im happy with how it turned out. Also, it was easier for me to get these hellas then mess around on eBay.
Check out more pics!<<<<<< Cardomain Page. *******SOLD THE BAJA*********** But im still around, PM me if urgent!
Re: Offroad light install on roof basket with pics - write u
Sorry to bring this one back from the dead....but if the Bajas are prewired for roof lighting, where do the wires terminate on the top of the car? i have searched and cant find a wire harness in the rails? mine is an 03.Alpha Wolf wrote: Comes with relays and a new box and factory switch that uses the stock harness so no drilling on dash required. Note that the 2003 kit will work on a 2005 with just a $16 relay from your dealer as the 2003 uses a different relay to activate it. One already in use on the 2005.
thanks
-
- Scoobytruck Lurker
- Posts: 16
- Joined: Sun Feb 26, 2012 3:44 pm
- mikenmel08
- Scoobytruck Master
- Posts: 423
- Joined: Thu Jun 07, 2012 6:53 pm
- Location: NC
Re: Offroad light install on roof basket with pics - write u
From the info I have found online, it should be behind your cargo light. Now how you would get to it to use it is a whole other story.
-
- Scoobytruck Master
- Posts: 112
- Joined: Mon Apr 19, 2010 2:10 pm
- Location: Essex Junction, VT
- Contact:
Re: Offroad light install on roof basket with pics - write u
I unfortunally ruined my Hella 500 Yellow fogs on an excursion 2 months ago. And they do not make them in yellow anymore. SO! Therefore I'm dropping all use of Hella and buying some Lightforce.
Re: Offroad light install on roof basket with pics - write u
Old thread, but wanted to say thank you. This thread probably saved me a few hours and a severe headache.